
With over 1 billion active users, TikTok is one of the most popular social media platforms, especially among Gen Z. In recent years, face filters have become a big part of the TikTok experience, allowing creators to add fun and creative effects to their videos.
Step 1: Download and install Effect House
Head over to the official Effect House website and download the software for your operating system.
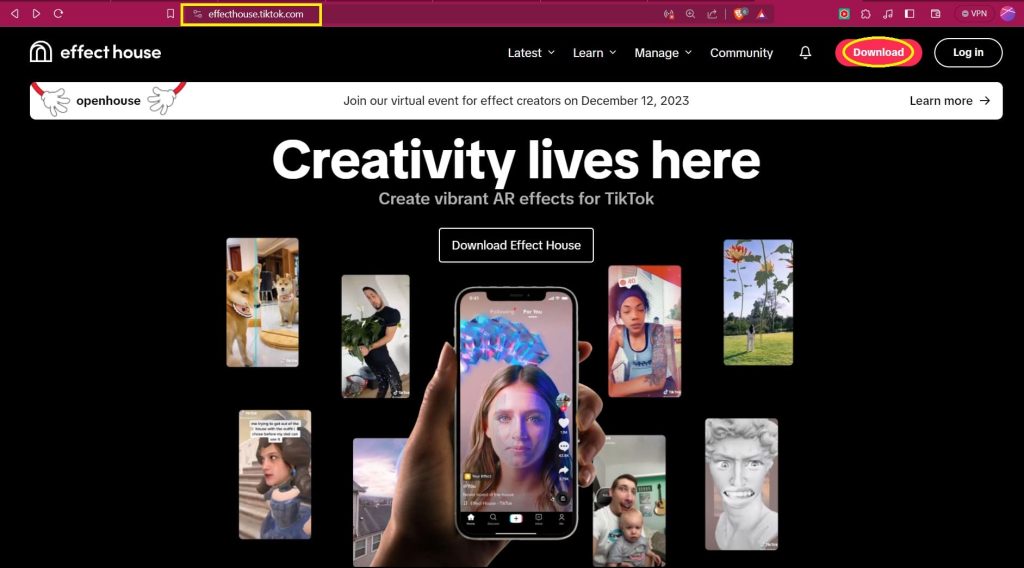
Follow the installation instructions and launch the program.
Step 2: Create a new project
Click on the New Project button or select the Face Effect template.
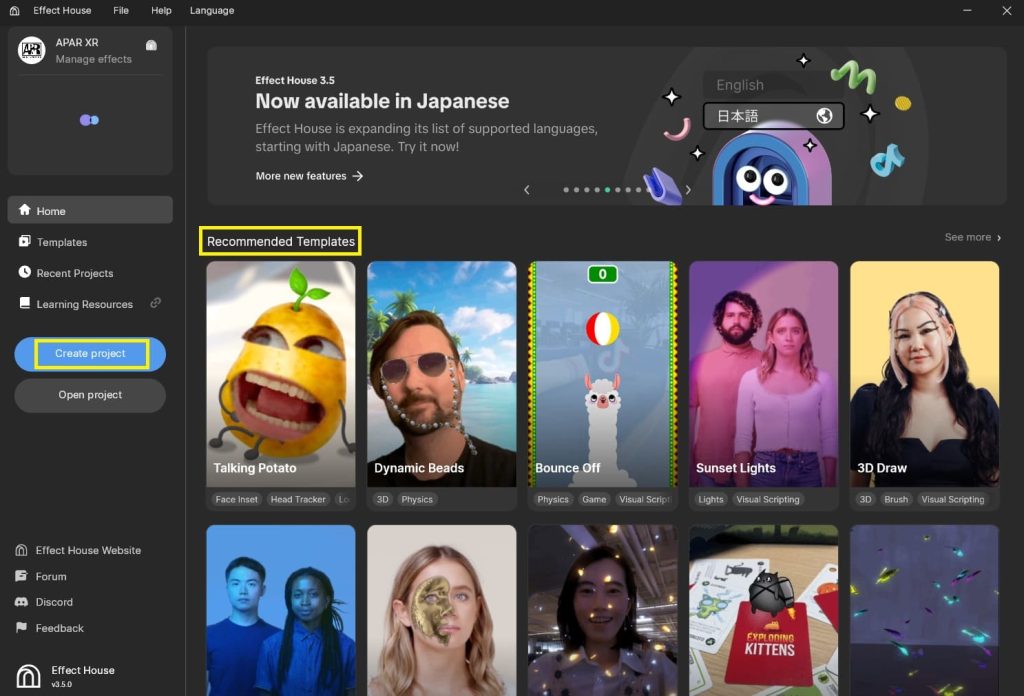
This will open up the Effect House interface, where you can start building your filter.
Step 3: Explore the interface
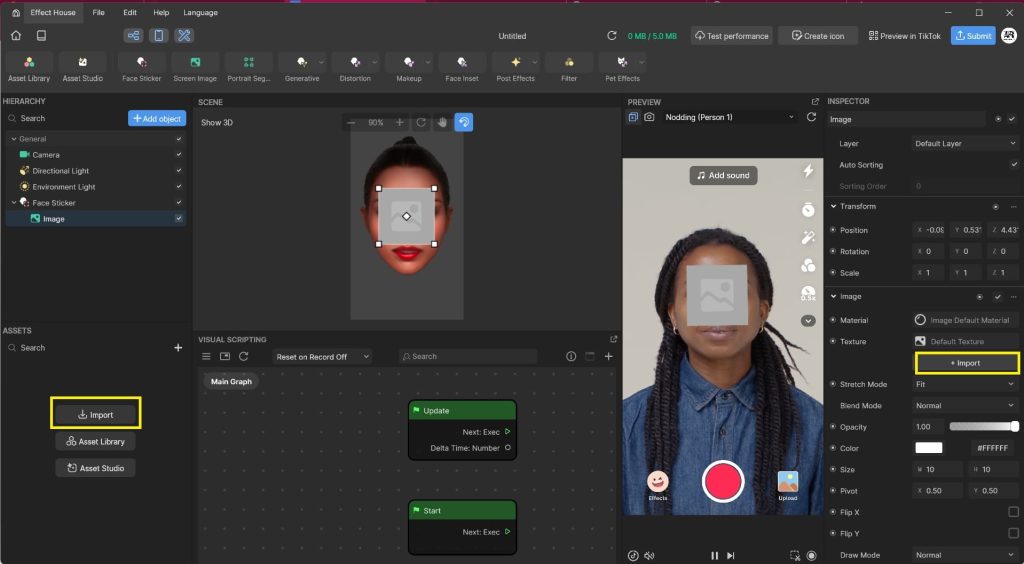
The interface is divided into five main sections:
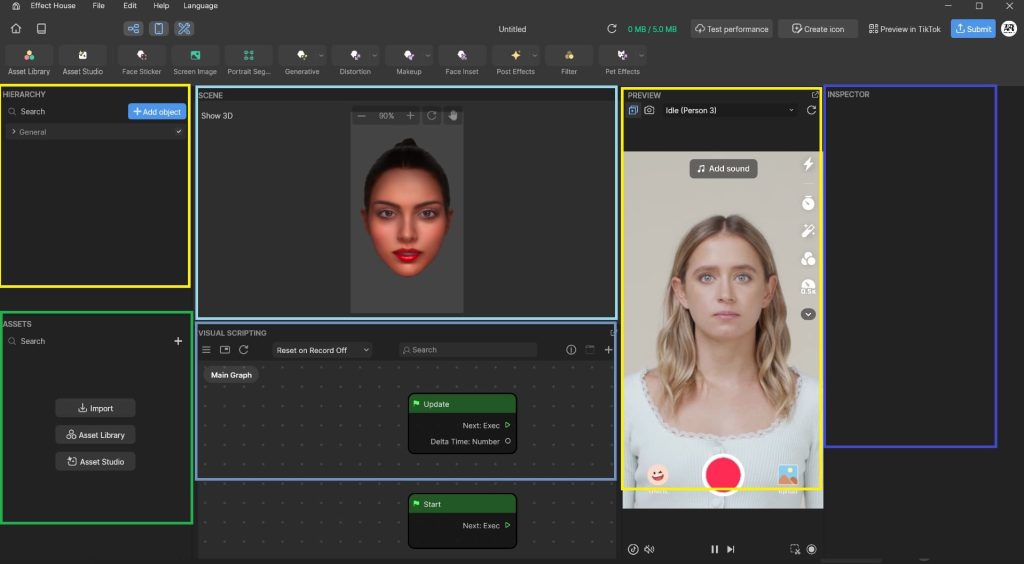
Hierarchy: This panel shows the different components of your filter.
Inspector: This panel allows you to edit the properties of each component.
Viewport: This is where you can preview your filter in real-time.
Scene : The Scene panel is your central hub for viewing, manipulating, and controlling all the objects in your Effect House project. Whether you’re working with 3D models, textures, or 2D elements, this space serves as your canvas for bringing your vision to life.
Assets Panel :The Assets panel lets you add textures, materials, objects, and audio to build your effect. Click the “+” button to browse existing assets or import your own.
Step 4: Add face tracking points
Click on the Add button and select face sticker .
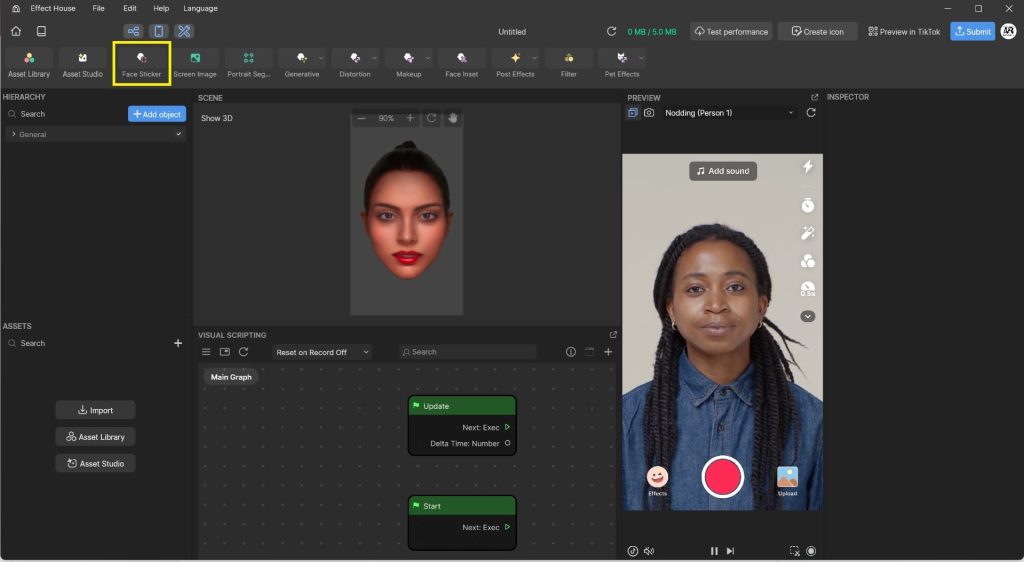
This will add a image icon to your scene, which we will replace with our.
Step 5: Add your desired effects
The possibilities are endless! You can add any 2D textures, create one , or use ai generated sticker inside asset studio.
Experiment with different effects and explore the various tools and features available in Effect House.
Step 6: Test and refine
Use the preview window to test your filter and see how it looks on different faces.

Make adjustments and refine your design until you are happy with the results.
Step 7: Publish your filter
Once you are finished, click on the Publish button and follow the instructions to submit your filter to TikTok.
[Image representing the Publish button]
Your filter will be reviewed by the TikTok team, and if approved, it will be available for everyone to use!
Tips for success:
Start simple and gradually add more complexity as you get more comfortable with the software.
Use high-quality assets and textures for a professional look.
Pay attention to lighting and shadows.
Test your filter on a variety of devices to ensure it works properly.
Promote your filter on social media and other channels.
Additional Resources:
Effect House website: https://effecthouse.tiktok.com/
Effect House documentation: https://effecthouse.tiktok.com/learn/guides/getting-started/introduction-to-effect-house
Effect House tutorials: https://www.youtube.com/channel/UC4bBKbvavjob7CpQ7_-vmWA
I hope this guide has helped you get started with creating your own face filter for TikTok. With a little creativity and effort, you can create something truly unique and engaging. So what are you waiting for? Start today and let your imagination run wild!
Sharing Your Filter:
Once your filter is published, share the link in the comments below! We would love to see your creations. I believe this blog provides a comprehensive and informative guide for beginners on how to create their first face filter for TikTok. The images enhance the content by providing visual aids and making the steps easier to follow. Additionally, the tips for success and additional resources offer valuable information for aspiring creators.